
You don’t need a monster camera to shoot meteors.
But you do need a handful of settings and techniques that actually work.
This post gives a clear camera recipe — aperture, ISO, shutter — and the field moves that turn brief streaks into striking photos.
I’ll show exact starting numbers, how to focus in live view, where to point relative to the radiant, and simple stacking tricks for post-processing.
Follow these steps and you’ll boost your odds of catching meteors without wasting a night.
Essential Camera Setup for Capturing Meteor Showers
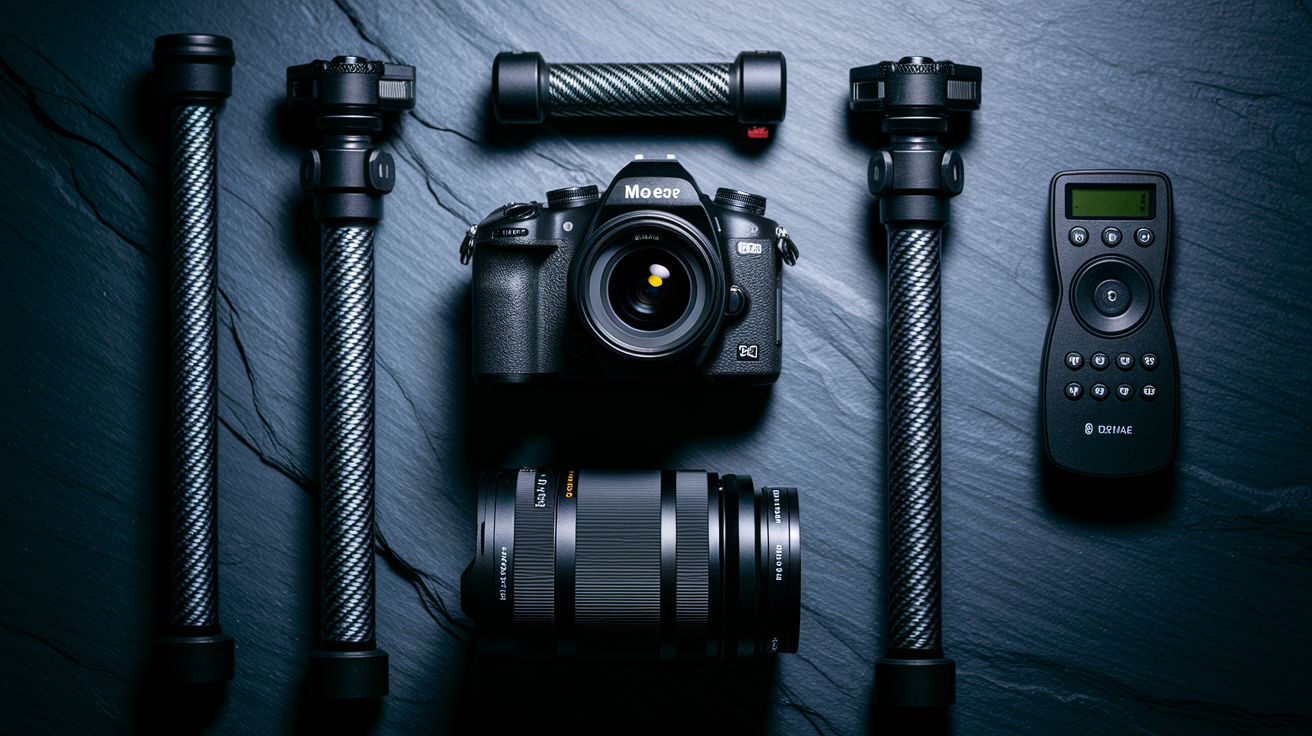
You need a camera with full manual control and RAW capability. Most DSLRs and mirrorless bodies from the last ten years will work. What really matters is the lens: grab something wide, 14 to 24mm, with an aperture of f/2.8 or faster. A bigger field of view means more sky in each frame, and that improves your chances of catching a meteor mid-streak.
Your tripod has to be solid. Long exposures show every tiny shake, and blurry stars ruin the shot. Carbon fiber is lighter and stiffer than aluminum, but either works if it holds your rig steady through a 20-second exposure in a light breeze. Pick up an intervalometer (or use the one built into your camera if you have it) so you can fire frames continuously with a few seconds between shots. You won’t miss anything while you’re checking your phone or adjusting your jacket.
Start with these settings: aperture wide open, f/2.8 or f/1.8 if you’ve got it. ISO somewhere between 1600 and 3200 depending on how your sensor handles noise. Shutter speed between 10 and 25 seconds, short enough that stars stay sharp instead of trailing. You can push ISO to 6400 under truly dark skies if your camera can take it, or drop to 1600 if light pollution is washing things out.
Here’s how to get your first test shot:
- Mount the camera, level the tripod head.
- Attach your wide lens, open the aperture all the way, switch off autofocus.
- Aim at a patch of sky away from the radiant, include some foreground if you can.
- Go full manual: ISO 3200, 20-second shutter, white balance around 3900K for dark skies or 3400K near light pollution.
- Focus manually in Live View. Zoom in on a bright star until it’s a tight dot, then tape the focus ring so it can’t drift.
- Fire one frame, check the histogram to make sure nothing’s clipped, confirm stars are sharp, tweak ISO or shutter if the exposure is off.
Choosing the Best Shooting Location and Conditions
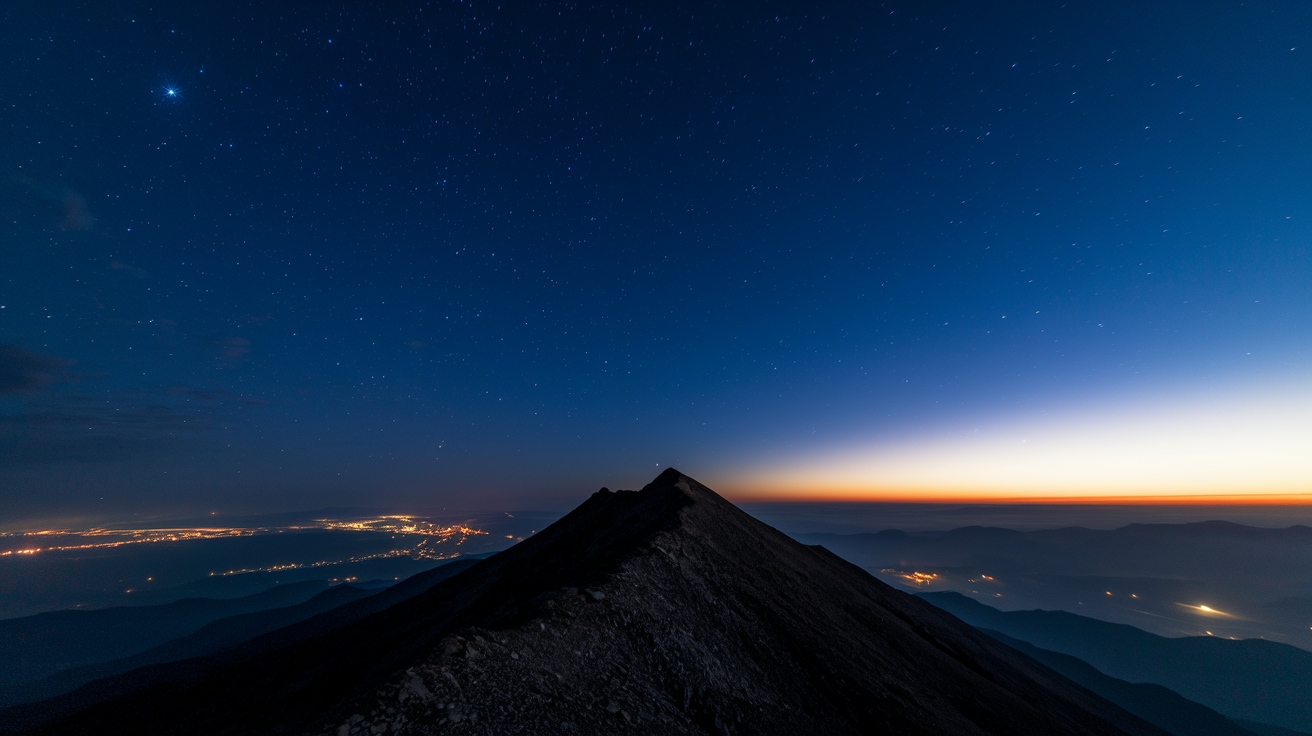
Light pollution kills meteor shots. Streetlights and city glow turn your sky orange and bury faint meteors even at ISO 3200. Find a spot rated Bortle 4 or darker using a light pollution map. Bortle 1 through 3 is ideal, but 4 and 5 are workable if they’re close enough to drive to. The goal is distance from cities and some terrain blocking the brightest zones on the horizon.
Moon phase is nearly as important. A full moon or even a 60-percent-lit gibbous will drown out dim meteors and force you to dial down ISO or shorten your shutter, cutting your odds of catching anything faint. Check the lunar calendar and pick nights when the moon sets before midnight or rises after your shooting window. Cloud cover is the other deal-breaker. You need clear skies, so watch satellite weather and ground forecasts in the 24 hours before you leave. Even scattered high clouds can block chunks of sky and wreck half your frames.
Timing Your Shoot for Maximum Meteor Activity
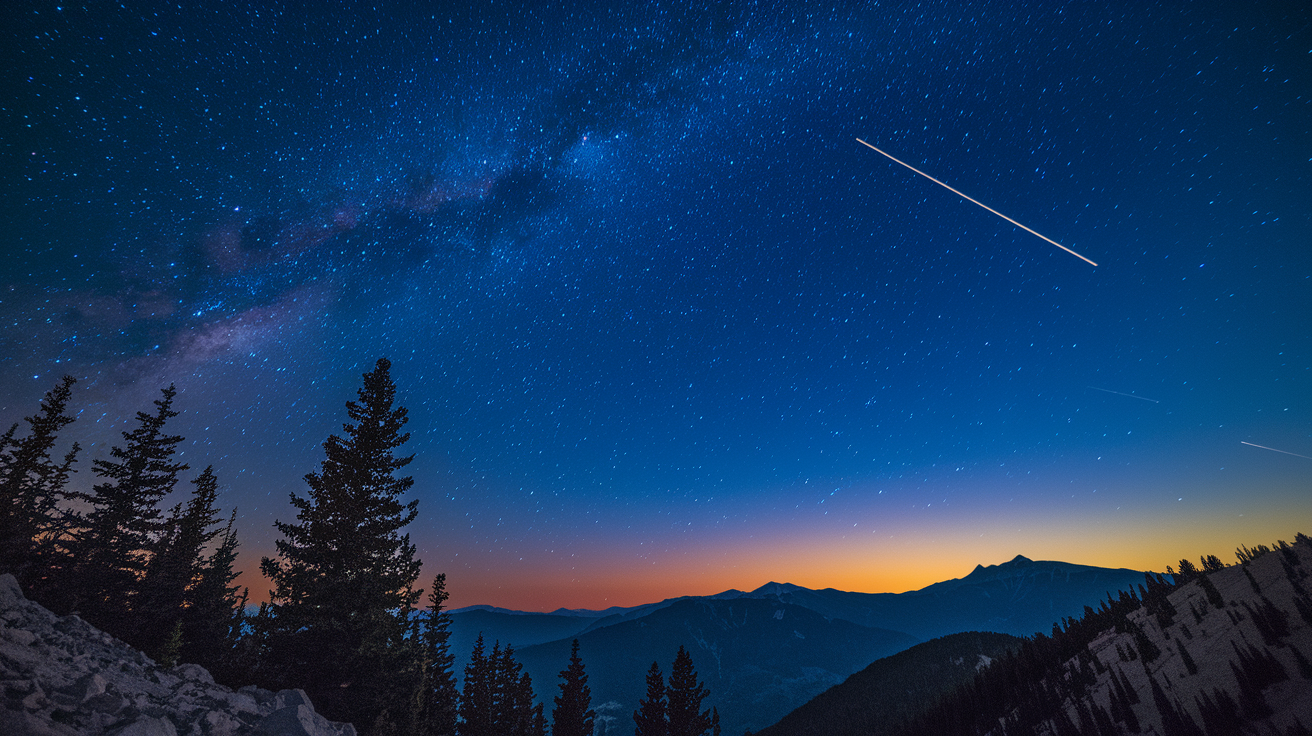
Most showers peak after local midnight and run until astronomical twilight, roughly 90 minutes before sunrise. After midnight your spot on Earth rotates into the meteoroid stream, so collision rates go up and you see more meteors per hour. Arrive a few hours early so you can set up in daylight, lock in your composition, and nail focus while you can still see.
The radiant is where meteors seem to originate from, based on Earth’s path through the debris trail. For the Geminids it’s near Castor in Gemini. For the Perseids it’s in Perseus close to the Double Cluster. Don’t point your camera straight at the radiant. Meteors streaking away from it show longer, more dramatic trails if you compose 45 to 90 degrees off in azimuth. When the radiant is low just after it rises, you can catch Earth-grazers, slow meteors that skim the upper atmosphere and leave long bright streaks across a big section of sky.
Composing Meteor Shower Images for Impact
Foreground elements turn a record shot into something with depth. A silhouetted tree line, a distant ridge, an interesting rock. These anchor the viewer’s eye and give scale against the huge sky. Put your horizon in the lower third of the frame using the rule of thirds, leave the upper two-thirds for sky where the meteors will appear.
Wider lenses cover more sky and raise your odds of catching a meteor. But don’t go so wide that meteors become tiny streaks lost in fisheye distortion. A 14mm or 16mm on full-frame hits a good balance between coverage and visibility.
Five ways to improve your compositions:
- Aim 60 to 90 degrees away from the radiant so meteors have longer visible trails instead of looking like head-on dots.
- Include a leading line in the foreground (road, fence, ridgeline) to pull the viewer’s eye into the frame.
- Frame the radiant near one edge if you’re planning to stack multiple exposures later, creating a convergence effect where meteors point back to a single vanishing point.
- Use natural or artificial light sources (distant town glow, campfire) to add warm color contrast against the cool blue-black sky.
- Shoot both horizontal and vertical orientations during the same session to give yourself editing options and catch meteors that streak along different paths.
Troubleshooting Common Meteor Photography Problems
Blurry stars mean your tripod shifted during the exposure or your focus wandered off infinity. Wind can shake even heavy tripods, so hang a camera bag or water bottles from the center column hook if your model has one. Check that every knob and joint on the tripod head is locked before you start your intervalometer run. If stars are still soft, re-focus in Live View at maximum magnification on the brightest star you can find, then tape the focus ring with gaffer tape so it can’t turn.
High ISO brings visible noise, especially in shadows and across the sky. Modern cameras handle ISO 3200 fine, but older sensors or budget models can show heavy grain by ISO 6400. The tradeoff is that lowering ISO to cut noise also dims faint meteors and you might miss dim streaks completely. Test your camera’s noise threshold at home by shooting a dark scene at ISO 1600, 3200, and 6400, then compare the results at 100-percent zoom. Use the highest ISO that still looks acceptable to you. In post you can apply targeted noise reduction to the sky while keeping the foreground sharp.
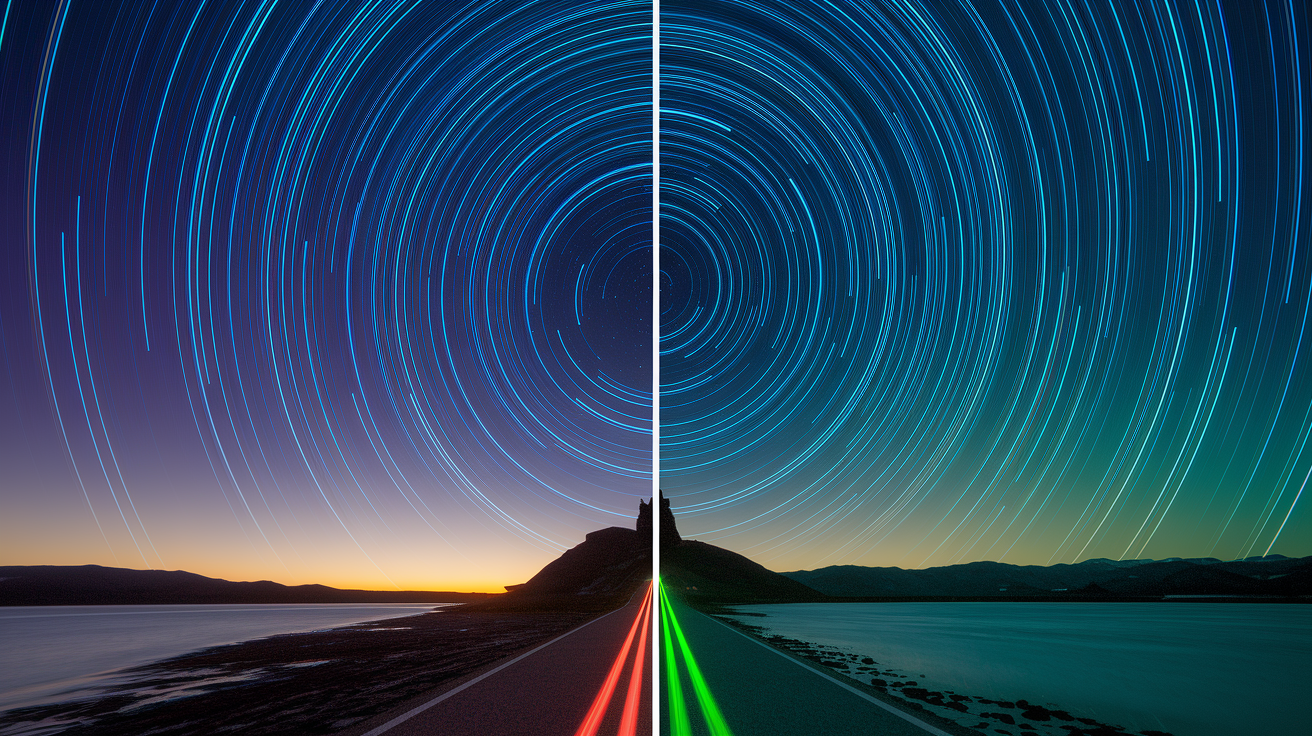
Long exposures past 25 seconds on wide lenses can cause star trailing, turning pinpoint stars into short dashes. This happens because Earth’s rotation moves the stars across your sensor during the exposure. Calculate your maximum clean shutter speed using 500 divided by your focal length in millimeters (on full-frame; multiply the focal length by your crop factor first if you’re on APS-C). A 16mm lens on full-frame allows roughly 500 ÷ 16 = 31 seconds before trailing shows up, but stopping at 20 to 25 seconds gives you a safety margin. If you see trails, shorten your shutter by five-second steps until stars stay sharp.
Post-Processing Meteor Shower Images
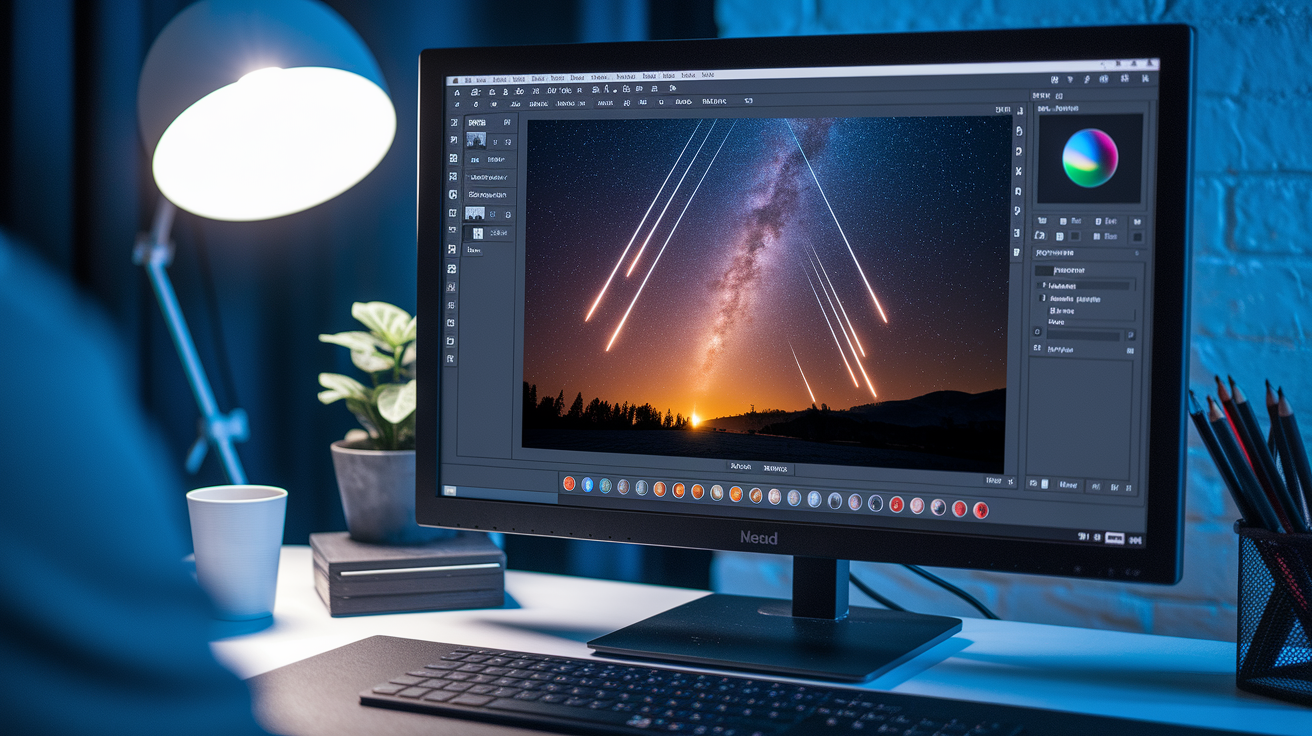
Raw files hold more recoverable detail than JPEGs, so import the raws into your editing software and make global adjustments first. Increase contrast and clarity to emphasize the brightness difference between meteors and the surrounding sky. Pull down highlights if the meteor trail is blown to pure white, and lift shadows a bit to reveal foreground detail without adding too much noise. Adjust white balance if your in-camera setting produced a color cast that feels off. A slightly cooler tone around 3900K often works for dark-sky shots, but trust your eye and the conditions you shot under.
Noise reduction matters when you’re working with high ISO captures. Most raw processors have luminance and color noise sliders. Start with moderate luminance noise reduction to smooth the grainy texture in the sky, then add a small amount of color noise reduction to kill random color speckles. Don’t over-smooth because aggressive noise reduction softens stars and erases faint meteor details. If you captured multiple frames with meteors, you can stack them in Photoshop or similar software using the Lighten blend mode, which keeps the brightest pixels from each layer and composites all the meteors into one frame. This works especially well when you align frames by rotating them around the celestial pole (Polaris in the Northern Hemisphere), making all the meteor trails converge back toward the radiant for a dramatic hyperspace effect.
| Editing Task | Purpose |
|---|---|
| Contrast and clarity boost | Makes meteor trails stand out against the sky and sharpens star detail |
| Luminance noise reduction | Smooths grain from high ISO shots without destroying fine star points |
| Highlight recovery | Prevents blown-out meteor cores and preserves color in bright trails |
| Frame stacking (Lighten mode) | Combines multiple meteors from separate exposures into one composite image |
Final Words
Set up your tripod, frame a wide field, and start a string of 10–25s exposures, quick actions you’ll repeat all night.
We covered exact camera settings and gear, how to pick dark skies and the best time around the peak. You also learned composition tips to add foreground and long trails, fixes for blur and noise, and simple edits that make meteors pop.
Keep practicing. Every session teaches you something, and with the right prep, meteor shower photography gets easier and more rewarding.
FAQ
Q: What time is the meteor shower on October 21st?
A: The meteor shower on October 21st is usually best seen after local midnight into pre-dawn, often peaking around 1:00–4:00 AM local time; exact timing depends on the shower and your time zone.
Q: Can you take pictures of a meteor shower and how do you photograph one with an iPhone?
A: You can take pictures of a meteor shower, and with an iPhone use a tripod, Night mode or a long-exposure app, lock focus to infinity, choose a wide sky view, and shoot many continuous exposures.
Q: What is the 400 rule for astrophotography?
A: The 400 rule for astrophotography says divide 400 by your lens focal length (mm) to estimate the longest exposure in seconds before star trailing; for crop sensors divide focal length by the crop factor first.